- Data Hub Overview
- New Data Hub Features
- Accessing Data Hub for Moodle 2
- Data Hub Configuration
- Importing/Processing Files
- Viewing Logs
- Accessing the Import, Export, and Log Folders Via SFTP
- Setting Up User Import Files
- Importing Course Information
- Importing Enrollment Information
- Exporting Grade Information from Moodle via DH
- Importing very large user and enrollment files:
- Automating Data Hub
- Full list of actions and required fields for each
Data Hub 2.0
Data Hub Configuration
To view the Data Hub Basic configuration go to the Site Administration menu and select Plugins > Local plugins > Data Hub plugins > Version 1 import link.
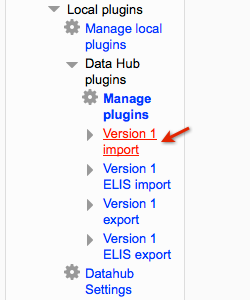
This opens the Version 1 import settings screen.
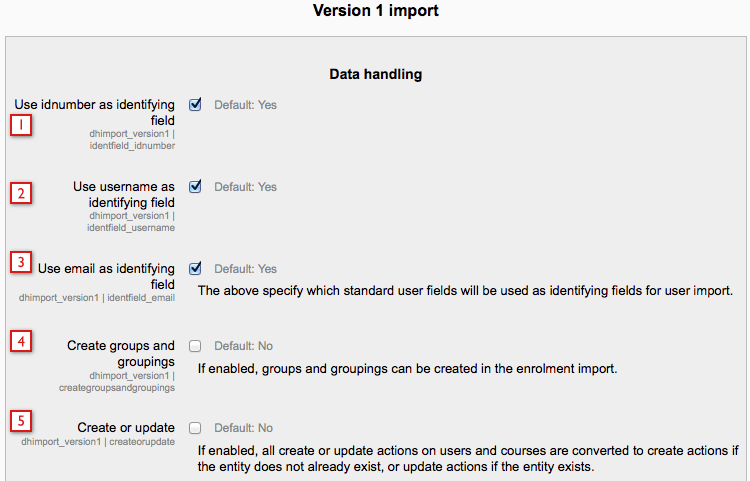

This opens the Version 1 import settings screen.

- Use idnumber as identifying field: This setting will be available in the next release.
- Use username as identifying field: This setting will be available in the next release.
- Use email as identifying field: This setting will be available in the next release.
- If this is selected then Data Hub will create create groups and groupings in Moodle courses users are enrolled in, if those groups and/or groupings are specified in the import file. If this is not checked then DH will still add users to groups and groupings as specified in the import file, but will not create groups/groupings if they don't already exist in the Moodle courses.
- If this is selected then when DH process an update action, it will create the user if the user being updated does not already exist. This is useful for SIS systems such as Datatel which can only do full dataset exports.
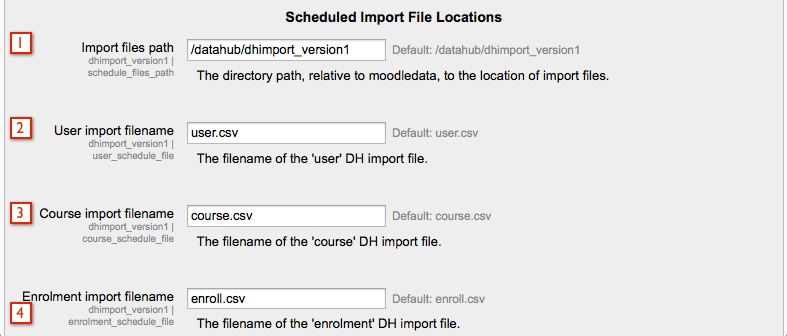
- This is the import file path - where DH will look for files. Please consult with RL Support before changing this path.
- This is the name of the import file name. For example if your SIS/HR system names files it exports mysystem.csv you can tell DH that this will be what the files are named.
- This is the same idea as above - setting a different name here will tell DH to look for a file with the name you set for course import files.
- Setting a different name here will tell DH to look for a file with the name you set for enrollment import files.

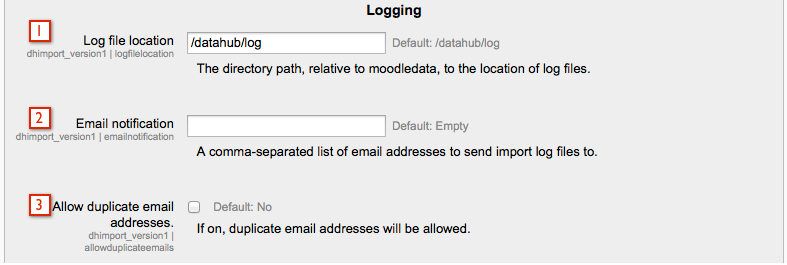
- By default Data Hub will place log files in /rlip/log in your data directory. This can be changed to a different location if you would prefer.
- You can enter email addresses in here for users to be sent the import logs. This is handy as it gives your System Admin a quick way to know that imports are working correctly and/or know if there are problems.
- This new Data Hub setting allows duplicate email addresses when enabled.
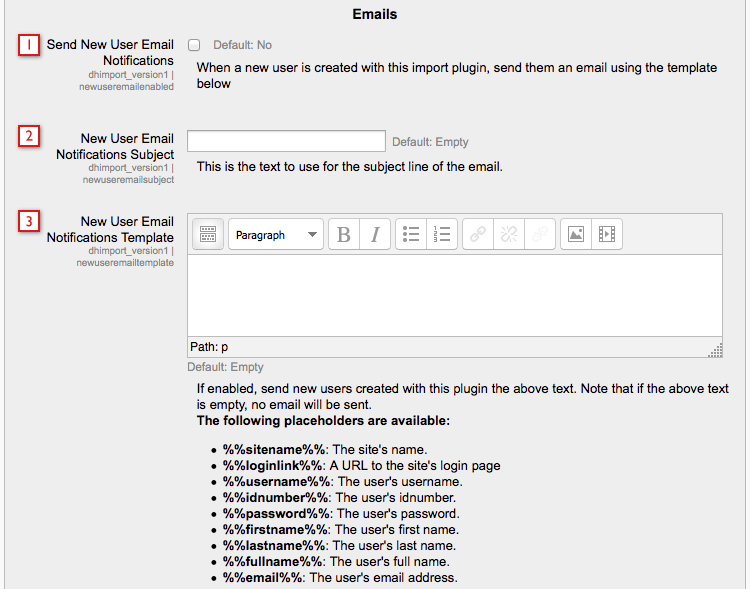
- Send New User Email Notifications: Email notifications will be sent to new users.
- Send User Email Notifications Subject: Enter the subject for the email.
- New User Email Notifications Template: Enter the content for the email. For example: %%firstname%% %%lastname%% an account has been created for you at %%sitename%%. Your username is %%username%% and your password is %%password%%. %%loginlink%%.
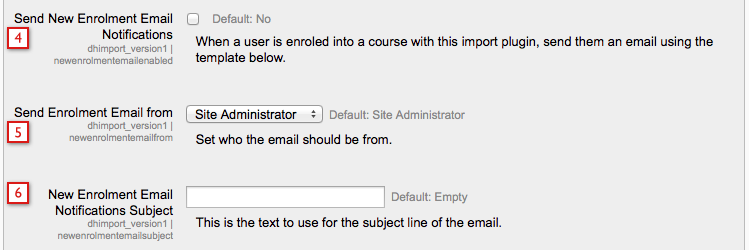
- Send New Enrollment Email Notifications:
- Send Enrollment Email from:
- New Enrollment Email Notifications Subject:
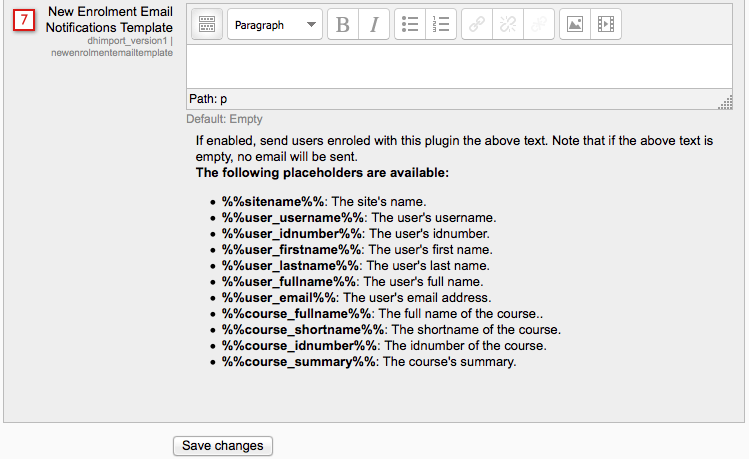
- New Enrollment Email Notifications Template: